

Key Takeaways
A used gearbox can be a sensible repair, but only when its identity, condition, and total cost are clear.
- Match the transmission by model, year, engine, drivetrain, and code.
- Ask for donor-car details, mileage evidence, inspection notes, and warranty terms.
- Inspect the casing, shafts, mounts, seals, fluid, and connectors before purchase.
- Budget for labor, fluid, seals, shipping, taxes, programming, and possible core charges.
- Use a qualified technician and confirm shift quality after installation.
Understand your Chery transmission options
Choosing among second hand Chery transmissions starts with understanding what is being replaced. A manual gearbox has a different operating system and service pattern from an automatic or CVT, so the diagnosis must be specific. The cheapest unit is not automatically the best value if it needs extensive preparation or does not match the vehicle.
Manual, automatic, and continuously variable transmission differences
A manual transmission uses a clutch and selectable gears, while a conventional automatic uses hydraulic and electronic controls to select fixed gear ratios. A continuously variable transmission changes its ratio through a different mechanism and may require different fluid, diagnostic procedures, and adaptation steps. Identify the original transmission type before comparing parts.
The phrase “automatic” can also conceal meaningful differences between models. A unit with a torque converter, a dual-clutch design, or a CVT should not be treated as interchangeable simply because the shifter looks similar. The correct replacement must match the vehicle’s complete specification.
Common Chery models and transmission types
Model names alone are not enough to identify a gearbox. The same family may have different engines, production years, drivetrain layouts, or transmission options across markets. A Chery vehicle should therefore be matched through its identification information rather than through a photograph or a broad online listing.
Current and used-vehicle listings can help you understand how sellers describe model, mileage, and transmission information. For example, a Thorp Chery inventory page may be useful for seeing the sort of specification language used in vehicle listings, but it is not a substitute for the code on your own vehicle.
Used, rebuilt, and remanufactured transmission comparisons
A used gearbox normally comes from a donor vehicle and is sold according to available history and inspection. A rebuilt unit has been opened and repaired with selected replacement parts, while a remanufactured unit is generally restored to a defined specification by a specialist process. Terminology varies between sellers, so ask exactly what work was completed.
Request a written description of testing, replaced components, mileage, warranty duration, and return conditions. That detail matters more than a vague label such as “excellent condition.” It also makes price comparisons fairer because two units described differently may have very different preparation behind them.
When a replacement transmission is better than a repair
Replacement can make sense when the original casing is damaged, internal parts are unavailable, or the repair estimate approaches the price of a tested replacement. Repair may still be preferable when the fault is limited to an accessible seal, sensor, clutch component, or other serviceable part. A technician should diagnose the failure before either option is chosen.
A replacement also has risks: the donor unit may carry hidden wear, and installation may reveal related problems. Compare the likely repair bill with the replacement unit, labor, warranty, and ancillary parts rather than comparing purchase prices alone.
Confirm compatibility before you buy
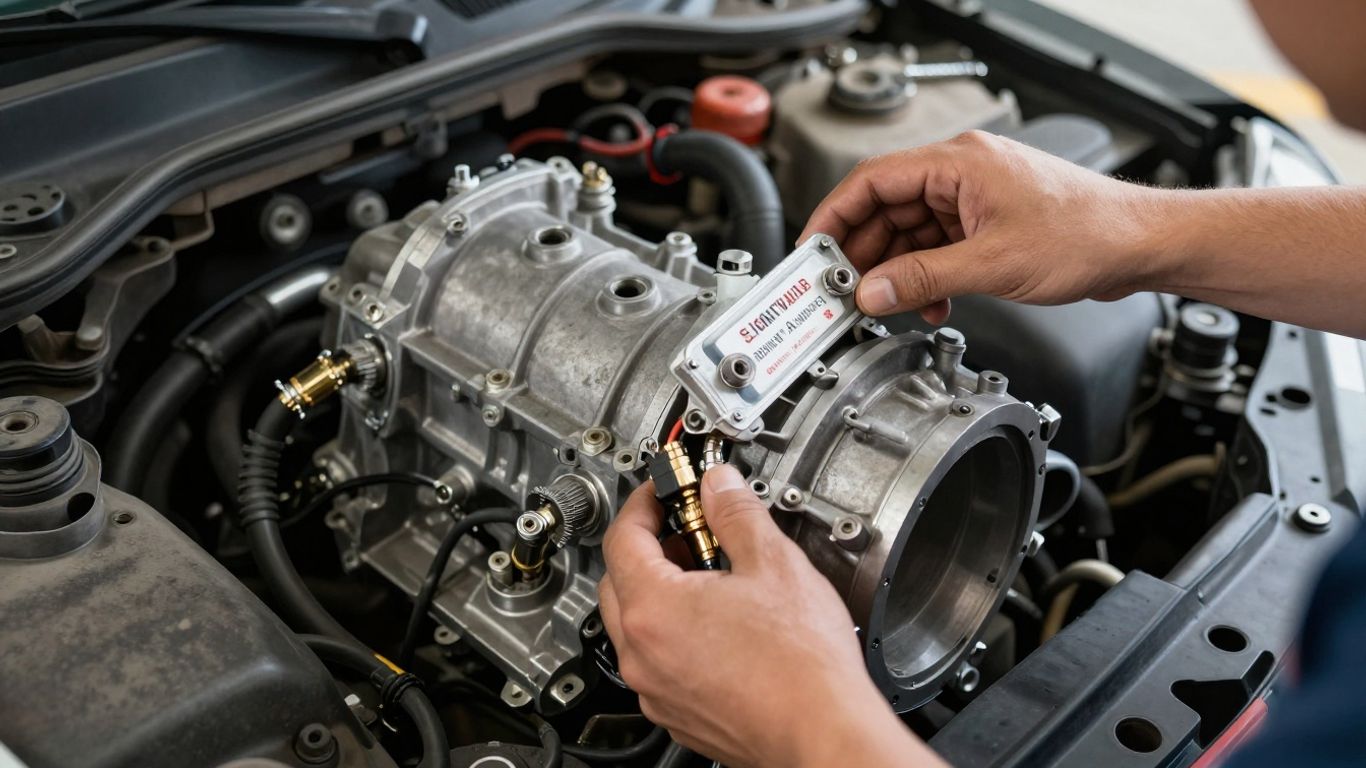
Compatibility is the point at which a promising listing either becomes a usable part or an expensive mistake. The model badge is only the beginning. Record the vehicle identification number, production year, engine details, drivetrain, and every readable marking on the original unit before contacting sellers.
Matching the transmission to the Chery model and year
Start with the exact model and production year, then check whether the vehicle is front-wheel drive or all-wheel drive. Facelifts and market changes can introduce different mounts, control units, or ratios within what appears to be the same model generation. Ask the supplier to confirm the match in writing.
Do not rely on a listing title such as “fits Chery SUV.” A proper match should identify the application, transmission type, engine pairing, and any restrictions. If those details are missing, treat the part as unverified until the seller supplies them.
Checking the engine, drivetrain, and transmission codes
Transmission and engine codes are stronger evidence than a general model description. Photograph the original label and casting marks, and compare them with the proposed replacement. The vehicle identification number can help a technician or parts specialist confirm the factory configuration.
Keep copies of the photographs, messages, and invoice. If a dispute arises, that record shows what information the seller received and what part was promised. It also helps the installer spot a mismatch before the old unit is removed.
Comparing gear ratios, sensors, and electronic connectors
A gearbox may bolt to the engine and still be unsuitable. Gear ratios affect engine speed and drivability, while sensors, solenoids, wiring plugs, and control modules must communicate correctly with the vehicle. Compare connector shapes, mounting points, axle outputs, and the number and position of sensors.
This is where a qualified parts specialist earns their fee. A visual match is useful, but it cannot confirm internal ratios or electronic compatibility. Ask which items transfer from the old transmission and which must remain with the replacement.
Verifying left-hand-drive and market-specific differences
Market-specific versions can differ in wiring, calibration, emissions equipment, cooling arrangements, and steering-side packaging. Left-hand-drive and right-hand-drive vehicles may also have different brackets or clearance requirements. Confirm the market, steering position, and original equipment specification before payment.
A seller who cannot answer these questions may still have a usable unit, but the risk belongs to the buyer. Pause the transaction until the unknowns are resolved, especially when shipping a heavy part across borders.
Inspect a second hand Chery transmission
A second hand Chery transmission should be inspected as a mechanical component, not accepted as an attractive photograph. Ask for clear images from several angles and request condition information that can be checked when the unit arrives. If possible, have a technician inspect it before installation.
Reviewing mileage, vehicle history, and donor-car details
Mileage is useful context, although it is not a complete condition report. Ask for the donor vehicle’s year, engine, drivetrain, reason for dismantling, accident history, and whether the transmission was operating before removal. A documented donor vehicle is easier to assess than an anonymous unit.
Owner experiences can reveal what to investigate, but they are not a diagnosis. For example, 2010 Chery Tiggo reviews may mention clutch or steering concerns, yet those accounts should guide questions rather than prove that a particular gearbox is faulty.
Checking the housing for cracks, leaks, and impact damage
Examine the casing, bellhousing, mounting ears, drain area, and axle openings for cracks or deformation. Freshly cleaned metal can hide seepage, so ask whether the unit was degreased or painted before sale. Look for impact marks that could have altered alignment even if the housing appears intact.
Small surface marks are not automatically serious, but a damaged mounting point or bellhousing can prevent correct installation. Photograph anything questionable and get a written answer before accepting the part.
Evaluating shafts, mounts, seals, and fluid condition
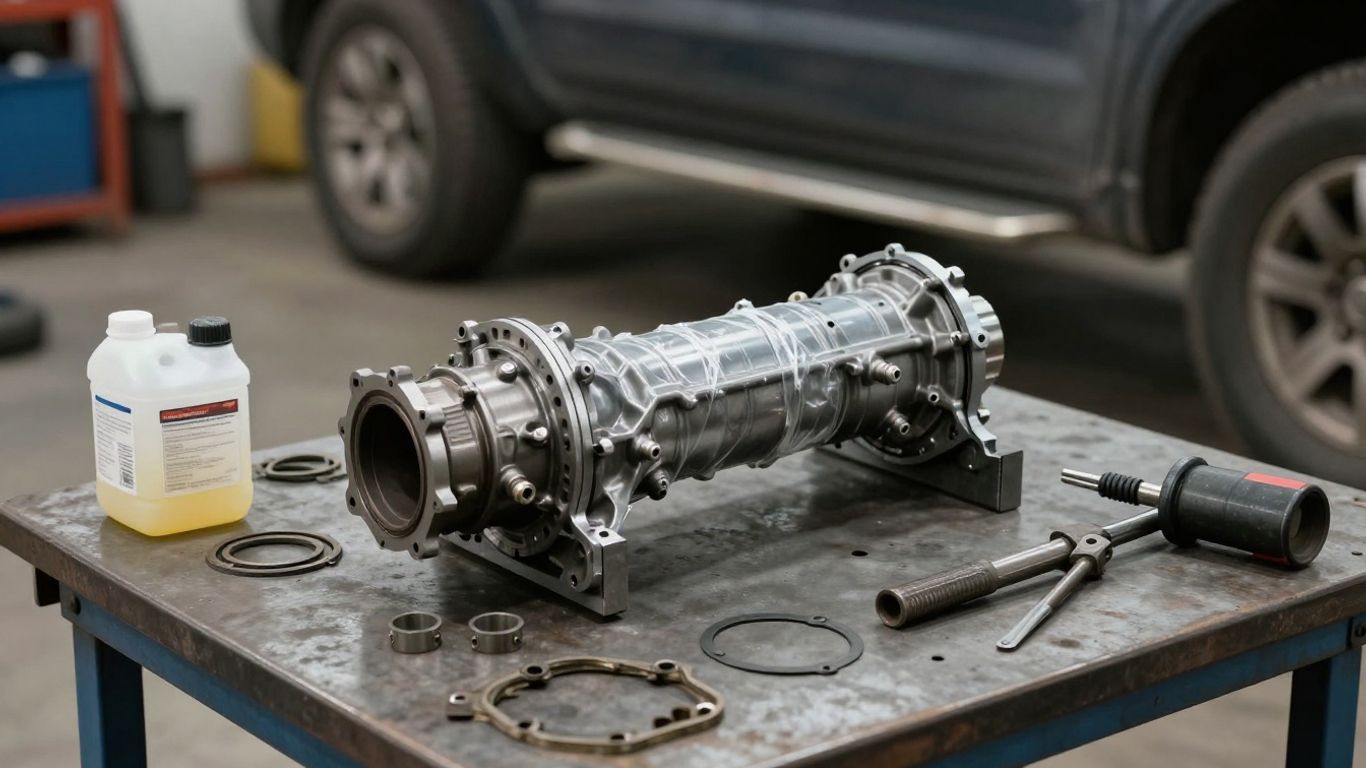
Check input and output shafts for excessive play, rough rotation, corrosion, or damaged splines. Inspect mounts, brackets, plugs, seals, and threaded holes for missing or distorted hardware. If fluid is available, note its level, smell, color, and any visible metallic debris.
Some seals and mounting components are inexpensive compared with the labor required to replace them later. That is why an inspection should produce a preparation list, not just a yes-or-no verdict. Replace accessible wear items while the unit is out of the vehicle when the technician recommends it.
Identifying warning signs of internal wear
Grinding residue, burnt fluid, unexplained play, damaged splines, and a history of slipping or delayed engagement can point to internal wear. No single sign proves failure, but several together should reduce the price you are willing to pay or end the transaction.
A low purchase price cannot compensate for an unknown failure.
A seller should be able to explain how the unit was tested and what the warranty covers. If the answer is limited to “it came from a running car,” the risk remains largely unmeasured.
Calculate the total replacement cost
The purchase price is only one line in the replacement budget. Installation can require fluids, seals, filters, mounts, programming, shipping, and diagnostic time. Write down each cost before committing so a seemingly inexpensive unit can be compared with repair or a more thoroughly prepared alternative.
Comparing purchase prices from salvage yards and dealers
Salvage yards may offer donor-car history and a standard grading system, while dealers or specialist suppliers may provide more structured testing and warranty support. Compare like with like: mileage, included components, test documentation, and return terms all affect value.
A used Chery vehicle marketplace such as used Chery cars can show how mileage and transmission type are presented in vehicle listings, but a complete car listing is not the same as a verified gearbox listing. Separate market browsing from parts verification.
Estimating labor, fluid, seals, and additional parts
Ask the installer for a written estimate that covers removal, replacement, inspection of the clutch or torque-converter area, fluid, seals, filters, mounts, diagnostics, and road testing. Automatic and CVT systems may also require specific procedures after installation. Labor can rise if fasteners are seized or related components are damaged.
These are the common cost lines worth confirming:
- Transmission purchase price and inspection fee.
- Removal, installation, diagnostics, and adaptation labor.
- Correct fluid, filter, seals, gaskets, and mounting hardware.
- Replacement of damaged related components discovered during installation.
That list keeps the quote grounded in the actual job. It also gives you a useful way to compare a low-cost unit with a higher-priced one that includes testing or preparation.
Factoring in shipping, core charges, and taxes
Heavy parts can cost more to ship than expected, especially when crating, residential delivery, or cross-border handling is involved. Confirm whether the quote includes freight, taxes, delivery insurance, and a refundable core charge. Ask how the old transmission must be packaged and when the core refund is issued.
Get the delivery inspection procedure in advance. Some sellers require damage to be reported within a short period, and delaying inspection until installation can weaken a return claim.
Weighing used transmission savings against warranty coverage
Warranty length matters, but so do its conditions. Check whether coverage includes parts only or parts and labor, whether the unit must be installed by an approved technician, and whether fluid, programming, or consequential damage is excluded.
A lower-priced unit may still be sensible when its history is strong and the seller allows inspection. A more expensive option may be better when the warranty and testing reduce the chance of paying twice for removal and installation.
Choose a reliable seller and warranty
The right seller communicates clearly before taking payment. They should be willing to identify the unit, explain its inspection process, and state what happens if it does not match or fails under the warranty. Save the listing and written promises rather than relying on a phone conversation.
Questions to ask a transmission supplier
Ask who removed the unit, what vehicle it came from, how its mileage was established, and whether it was tested before removal. Clarify included sensors, brackets, torque converter or clutch components, fluid state, warranty requirements, and return deadlines.
A seller’s answers are part of the product assessment. Evasive replies, pressure to pay immediately, or a refusal to provide code photographs should make you slow down.
Understanding testing, grading, and return policies
“Tested” should have a specific meaning. Ask whether the test was performed in the donor vehicle, on a bench, or through inspection only, and request any available report. Find out whether grading refers to cosmetic condition, operating condition, mileage, or all three.
Read the return policy for restocking fees, shipping responsibility, damage claims, and labor exclusions. A policy that sounds generous in a headline may be narrow in its actual terms.
Comparing local sellers with online marketplaces
A local supplier may make inspection and collection easier, while an online marketplace may offer more inventory and price comparison. Neither option is automatically safer. The useful differences are traceability, communication, packaging, support, and the ability to resolve a mismatch.
Inventory pages such as Group1 Chery can help a buyer see how pre-owned vehicle stock is organized across locations. For the same reason that buyers compare Tamarindo and Brasilito before a property decision, compare the underlying terms rather than judging a listing by its headline price.
Protecting yourself from mismatched or misrepresented parts
Use a payment method with a clear dispute process, keep the invoice, and make sure the part number appears on the paperwork. Record the package condition on arrival and photograph the label before unwrapping or cleaning the unit.
The surrounding research can be just as methodical as Zimbabwe safari planning, insurance credentialing, home gym equipment selection, or choosing a pricing consultant: define requirements first, document the comparison, and do not fill gaps with assumptions. Those links are unrelated subjects, but the same habit of checking terms applies.
Prepare for transmission installation
Installation is more than removing one box and bolting in another. The technician should confirm compatibility again, inspect accessible related parts, follow the correct fluid procedure, and record any adaptations or diagnostic codes. Good preparation prevents a replacement unit from being blamed for a problem created during installation.
Replacing related seals, filters, and mounting hardware
Replace accessible seals, gaskets, filters, and damaged mounting hardware when appropriate. Inspect the clutch, flexplate, torque converter, axle seals, cooler lines, wiring, and mounts for related wear. Reusing a visibly damaged seal can turn a successful installation into a leak repair.
The technician should distinguish necessary replacement from optional preventive work. A written explanation helps control costs while still addressing parts that are difficult to reach once the transmission is installed.
Flushing the transmission system and using the correct fluid
Use the fluid specified for the exact transmission and follow the prescribed fill and level-check method. Some systems require a particular temperature range or sequence, and overfilling can be as harmful as underfilling. Cooler lines and related components may also need attention if the original failure produced debris.
Do not mix fluids based on color or a generic “automatic transmission” label. Keep the container and invoice as evidence of what was used, particularly if warranty conditions specify a fluid standard.
Programming or adapting electronic transmission controls
Modern transmissions may need diagnostic scanning, software configuration, or an adaptation procedure after installation. The required step depends on the vehicle and transmission, so the technician should consult the correct service information rather than guess.
A unit that engages mechanically can still shift poorly if its electronic settings are not appropriate. Record the diagnostic results and any warning lights before the vehicle leaves the workshop.
Selecting a qualified Chery technician
Choose a technician who can identify the transmission codes, use suitable diagnostic equipment, and explain the installation and testing plan. Ask whether they have handled the relevant model and transmission type, and whether their workmanship is covered separately from the supplier’s parts warranty.
The best arrangement makes responsibilities clear: the seller stands behind the part, while the installer stands behind the work. That distinction matters if a fault appears after delivery.
Test and maintain the replacement transmission
A replacement should be evaluated methodically before the job is considered finished. Start with stationary checks, then move to a controlled road test while watching for leaks, abnormal sounds, warning lights, and temperature changes. Keep the first drive close to the workshop in case an adjustment is needed.
Checking shift quality, engagement, and operating temperature
Confirm that the transmission engages without an unusual delay, harsh impact, slipping, or flare between ratios. A manual unit should select gears cleanly with the clutch fully released, while an automatic or CVT should respond consistently at different loads. Check operating temperature using the vehicle’s available readings or appropriate diagnostic equipment.
A smooth first shift is encouraging but not conclusive. Repeat the checks when cold and warm, and note conditions such as uphill acceleration or reversing that may expose a problem.
Diagnosing leaks, noises, and dashboard warning lights
Inspect the bellhousing, axle seals, pan or casing, cooler lines, drain plug, and connectors for fresh fluid. Listen for whining, grinding, rattling, or a change in noise with vehicle speed. Scan warning lights rather than simply clearing them.
A small leak should be traced to its source before the vehicle is returned. Warning lights may relate to a sensor, wiring, adaptation, or the transmission itself, so the stored code and testing process matter more than the light’s label.
Completing a post-installation road test
The road test should cover gentle starts, normal acceleration, stopping, reversing, parking maneuvers, and a short period at steady speed. The technician should compare actual behavior with the original complaint and confirm that no new vibration or drivetrain noise has appeared.
After the drive, recheck fluid level and inspect underneath for seepage. Keep the road-test notes with the invoice and warranty documents in case a follow-up is required.
Following maintenance practices to extend transmission life
Use the specified fluid and service intervals, repair leaks promptly, and avoid towing or loads beyond the vehicle’s limits. Pay attention to new shift changes rather than waiting for a complete failure. Early diagnosis saves money when a small issue can be corrected before it damages internal components.
Keep records of fluid services, mileage, diagnostic work, and repairs. That history supports future maintenance decisions and makes any later transmission problem easier to investigate.
Conclusion
Buying second hand Chery transmissions can work well when the part is identified by code, inspected with care, priced as a complete repair, and installed by a qualified technician. A little paperwork and a deliberate post-installation test are usually far cheaper than guessing twice.
Frequently Asked Questions
Is a used Chery transmission worth buying?
It can be worthwhile when the unit has credible donor details, compatible codes, a clear inspection record, and practical warranty coverage. Compare the complete installed cost with repairing the original transmission.
How do I confirm transmission compatibility?
Match the model, year, engine, drivetrain, transmission code, ratios, sensors, connectors, steering position, and market specification. Have a technician verify the information before purchase.
What should I inspect on a second hand gearbox?
Look for cracks, impact damage, leaks, shaft play, damaged splines, worn mounts, poor seals, contaminated fluid, and evidence of internal wear. Ask for testing and donor-vehicle information as well.
Does mileage prove a transmission is good?
No. Mileage provides useful context but does not show how the vehicle was driven, maintained, or damaged. Condition evidence and testing are more useful than mileage alone.
What extra costs should I budget for?
Allow for labor, fluid, filters, seals, mounts, diagnostics, programming, shipping, taxes, core charges, and repairs to related components discovered during installation.
Should I replace seals and fluid during installation?
Often, accessible seals and the specified fluid should be addressed while the unit is installed, but the exact work depends on the transmission and the technician’s inspection. Follow the correct service procedure.
What does a post-installation test involve?
Check engagement, shift quality, temperature, leaks, noises, warning lights, and behavior under varied driving conditions. Recheck the fluid and underside after the road test.